By default, Products have 2 taxonomies; categories and tags, these pages are known as the archive pages. The default design of these pages is really basic, just a list of products with a sidebar.
With the WooCommerce Builder plugin, you can build stunning layouts for the categories and tags and in a few clicks.
Like products, you have full control over the design of the categories and tags. The plugin gives you two main options for that:
1- One Layout for all product archive pages.
No matter how many categories or tags you have, you can build one layout and apply it as the default for all of them. You can build this layout in Divi Library or in the Archive Builder.

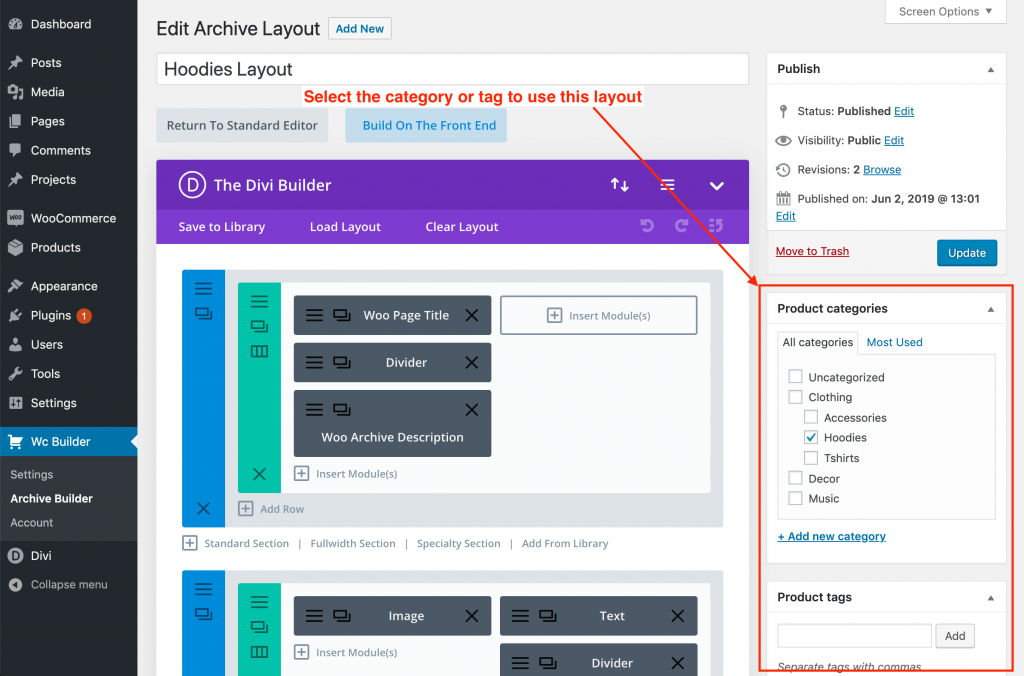
2- A specific layout for a specific category or tag
You can also give a specific archive another layout that differentiates it from any other archive page, this can be done in the Archive Builder.

Table of Contents
Build the archive layouts
Now, let’s build some stunning layouts for categories and tags.
Build the default layout
To build the default layout for your archive pages, we will use Divi Library.
1- Go to your admin dashboard -> Divi -> Divi Library.

2- At the very top, click “Add new,” a new layout popup will open. Here you can set the layout name and the layout type.
You can name the layout whatever you want but make sure you select “Layout” as the layout type. And then, click the “Submit” button.

3- Divi Builder will open, you can use the back-end builder or the front-end build, it’s completely up to you.
Archive modules
There are some modules you need to add to the layout to display the products and other basic elements on archive pages.
This is a list of the most important modules you need to use on archive pages.
1- Woo Notices
This is a very important module to add to every WooCommerce layout you build using the WooCommerce Builder plugin. This module displays a variety of messages from WooCommerce like when a product is added to the cart or there is no enough stock of a specific product and so on.
You can place this module anywhere you want but it is recommended to add it to the top of the layout so it’s very obvious for your clients.
2- Woo Page Title
This module will display the archive title. You don’t have to use this module, you can use a text module and add a custom title to your page.
3- Woo Breadcrumb
The breadcrumb module indicates the current page’s location, usually, it’ll be something like that “Home / Category Name”, this module is not required.
4- Woo Archive Products
The most important part of this archive layout is the products list! This Woo Archive module will take care of displaying the current archive products with sorting options, pagination, columns number and more.
5- Woo Products Search
The module adds a search box to your page to search for products, it’s very helpful if you have a lot of products and want to make it easy for your clients to get what they want. It is not required to use this module but it is a nice feature to have.
Apply the default layout
After creating the layout, go to your WordPress admin dashboard -> Wc Builder -> Shop & Archive tab -> Default Categories Layout or Default Tags Layout.
Select the layout you just created from the drop-down menu and save the changes.
The Archive Builder
It is the place where you can build layouts for specific categories or tags. The layouts here will override the default layout for all archives.
Building layouts in the archive is exactly the same as building them in Divi Library with one difference; on the editing page of the layout, you just select that specific category or tag to use this layout and override the default layout.
Example:
- In Divi Library, you built one layout and called it “Default Categories Layout”.
- From the plugin settings page -> Shop & Archive tab, you selected this layout to be the default layout for all categories.
- But, you want for the “T-shirts” category to have a different design, now, we use the archive builder.
- Go to the Archive Builder and build a layout there and check the box next to the “T-shirts” category.